👴 Timed Traffic Lights
Introduction
For junctions that need to handle high traffic volumes simple priority signs will not help you at all since vehicles on a non-priority road would only very rarely get the chance to enter the main road. With Traffic Manager: PE it is possible to program individually timed traffic light patterns for both single junctions and groups of junctions. Additionally, timed lights are able to react to changing demands: Within given bounds (which you define) they are able to adapt the length of red/green phases in order to maximize traffic currents.
Setup
Follow these steps to create timed traffic lights:
Click on the
 button.
Click on the
 button.
Click on the junction where you want to add the traffic light.
Optionally, click on a second, third, etc. junction.
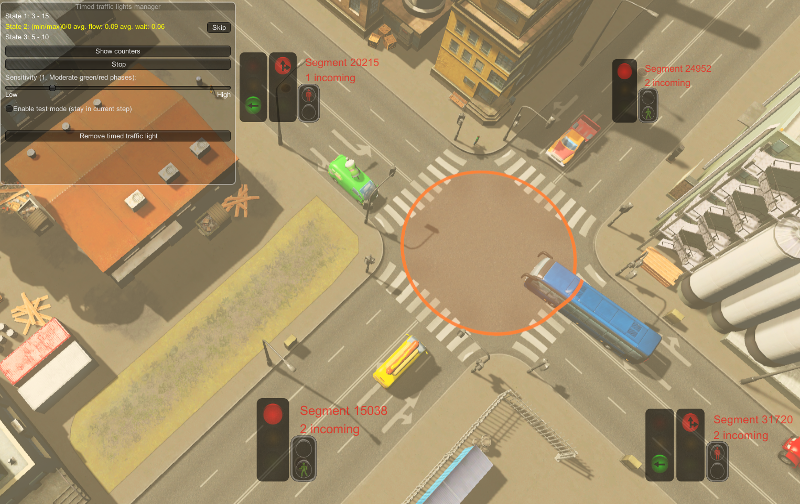
In the window on the top left click on Setup timed traffic light. The view should look familiar to you (if not, see Traffic Lights): For each road segment connected to the junction(s) you selected both a traffic light for vehicles and a traffic light for pedestrians appear. Currently, they are not toggleable.
Click on Add step to add the first timed step to your traffic light sequence. Now you are able to toggle the light states like you did in Traffic Lights.
When you have finished setting up the desired light pattern for this step you now may define a minimum and maximum time the step should remain active. The minimum time is (as the name implies) the time this step is guaranteed to be active. After the minimum time has elapsed, moving and waiting vehicles are being registered. If (roughly) more vehicles are passing the junction than waiting in front of a red light then this step remains active. If more vehicles are waiting, the next step is activated (which you have not defined yet).
After you have typed in some very meaningful numbers (e.g. 8 and 42) click on Add to add the step to the cycle.
Repeat the procedure at least one more time (because a traffic light with only one step does not really make sense).
After you have defined all steps it is time to start the cycle. Click on Start.
While the cycle is running you can manually skip the current step by clicking on Skip. When you have seen enough, click on the Stop button to stop the cycle.
While not being very user-friendly, you can use the up and down buttons to change the order of the steps.
When you click on the Edit button next to a step you may again edit the minimum and maximum time values for the appropriate step.
A click on the Delete button removes the step from the cycle.
Automatic/Manual pedestrian traffic lights
Apart from traffic lights for vehicles TM:PE also lets you control pedestrian light states for each connected road segment and program step. You can either use
the built-in automatic mode
AUTOorset up pedestrian lights manually
MANUAL.
Changing pedestrian light mode
While creating/editing a timed step click on the yellow header above the pedestrian light symbol in order to toggle between Auto and Manual mode.
Manual mode
Click on the pedestrian light symbol to toggle between green and red light state.
Note that if TM:PE detects that a pedestrian light never shows green throughout the whole traffic light program the respective pedestrian light will always show green and citizens are advised to avoid crossing the junction at this point.
Automatic mode
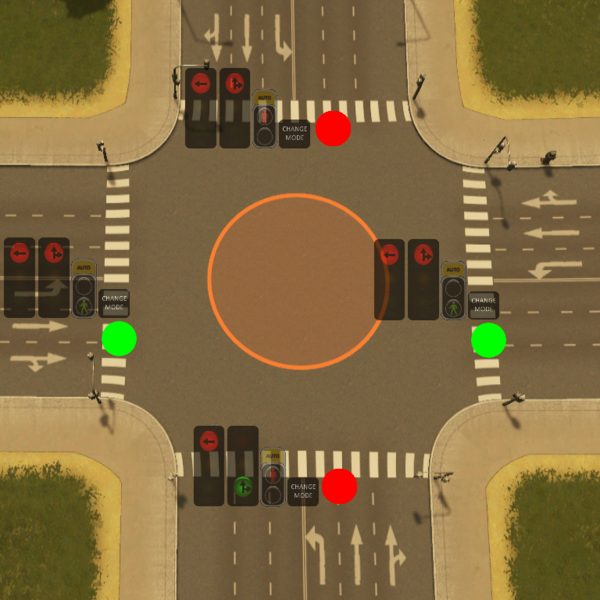
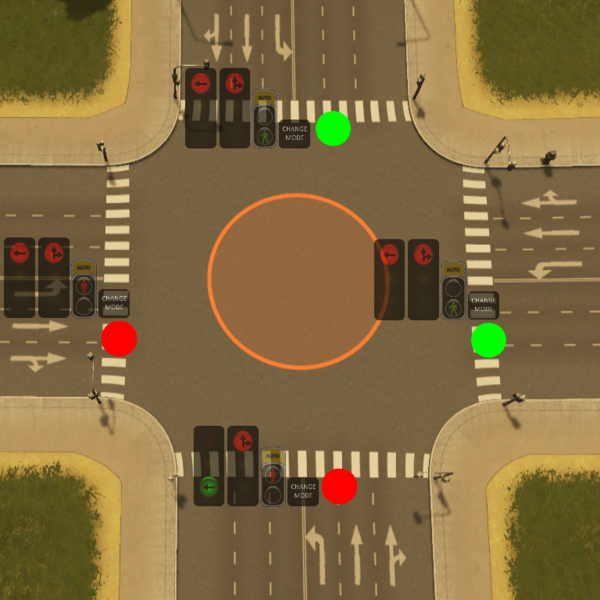
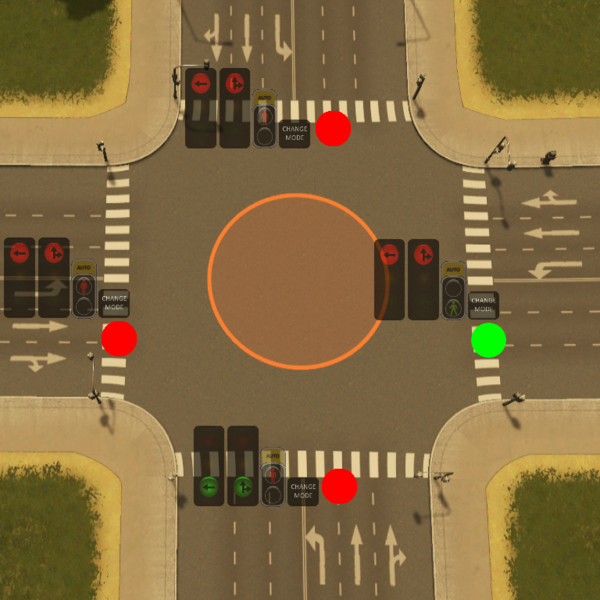
While in Auto mode, TM:PE calculates pedestrian light states for you by deriving them from the vehicle light states at each individual step. Pedestrian lights are set to red if at least one of the following conditions applies:
A traffic light indicates green for vehicles going straight.
Left-hand traffic only: A traffic light indicates green for vehicles turning right.
Right-hand traffic only: A traffic light indicates green for vehicles turning left.
However, the following special rule supersedes all previous rules: If TM:PE detects that a certain pedestrian light never changes to green throughout the whole traffic light program the respecting light is automatically turned into a constant green light. This happens in order to prevent cims from accumulating infinitely in front of red pedestrian lights. Additionally, cims are advised to avoid crossing the junction at the constant-green pedestrian light.
Examples
All examples below relate to right-hand traffic. For left-hand traffic, replace the word right with left and vice-versa in the following examples.
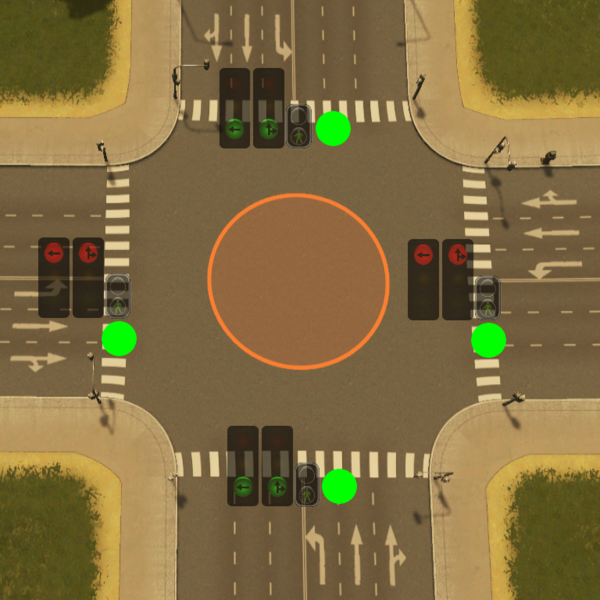
Adding/Removing a junction
If you want to add a new junction to your existing timed traffic light,
click on Add junction to this traffic light.
Click on the junction that you want to add.
The added junction may be part of another timed light group. If so, both timed traffic light groups are joined to one.
Removing a junction is equally simple:
Click on Remove junction from this traffic light.
Click on the junction that you want to remove.
Advanced Tuning
credits to @Glowstrontium for the idea
If you are a perfectionist you may want to control the importance (weight) that is given to flowing vehicles over waiting vehicles. Sounds complicated? It is (not)! With the default setting, the number of vehicles* currently crossing the junction is directly compared to the number of vehicles waiting in front of the junction. If more vehicles are going than waiting the traffic light stays green. If less and fewer vehicles are crossing the junction, there comes a point when more waiting than flowing vehicles are present and the traffic light changes its state. If you want to prolong the green (and thus the red) phase for a certain step – even if there are fewer vehicles moving than waiting – move the sensitivity slider to the left. The more you move it to the left-hand side the more importance you give to maintaining steady traffic flows. If you instead want to have short bursts of vehicles crossing the junction move the slider to the right, and you will notice this phenomenon.
To make it easier for you to find the sweet spot where magic happens I suggest you to make use of the Test mode option. When the timed light is started you notice a checkbox labeled Enable test mode (stay in current step) on the bottom side of the control window. When you enable the checkbox the current step remains active, and you can freely play with the slider controls without actually controlling the light. On the upper side of the window you can notice how the avg. flow value changes according to the slider setting. Moving the slider to the left makes the flow value bigger, moving it to the right diminishes it. In test mode, if the current step is highlighted green (that means avg. flow ≥ avg. wait) it would stay active with the current slider setting. If it turns red (avg. flow < avg. wait) the next step would be activated.
After tuning your traffic light, do not forget to disable test mode by deactivating the checkbox.
Actually we calculate sum of vehicle lengths divided by road segment length
Adaptive step switching
Adaptive step switching gives you more control of when steps are switched during the adaptive phase of a timed traffic light.
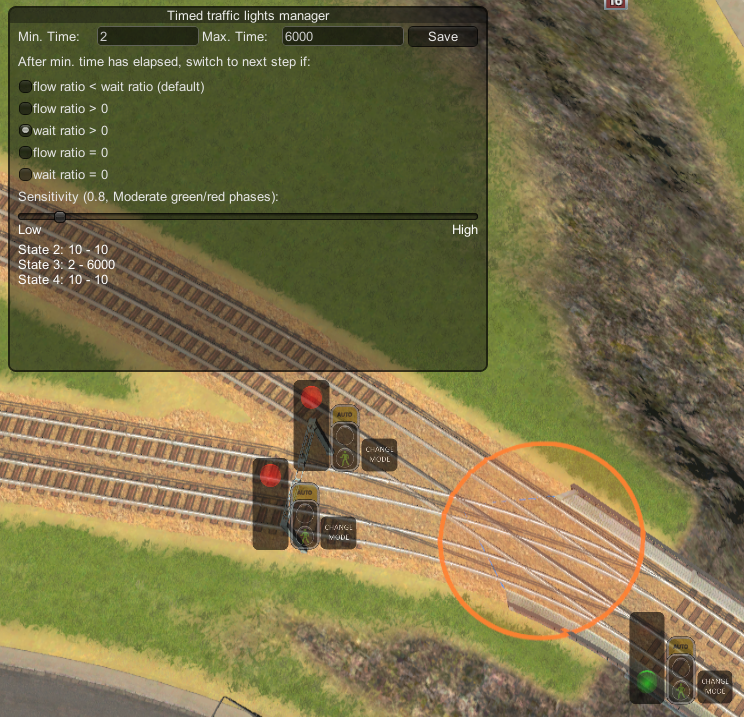
While traffic lights that control car traffic may change when (roughly) more vehicles are waiting than driving, at railway switches the underlying logic may be completely different, for example. A train passing the light may trigger it to show red.
TM:PE offers different types of additional switching conditions that are based on measured vehicle numbers (flow ratio vs. wait ratio):
Switching logic | Description |
|---|---|
flow ratio < wait ratio | Default condition. The step switches if the ratio of waiting vehicles exceeds the flow ratio. |
flow ratio > 0 | The step switches when the first vehicle is detected that may pass the traffic light. |
wait ratio > 0 | The step switches when the first vehicle is detected that must wait in front of the traffic light. |
flow ratio = 0 | The step switches when no vehicles are about to pass the traffic light. |
wait ratio = 0 | The step switches when no vehicles are waiting in front of the traffic light. |
Step switching logic is constantly checked after the step's minimum time is elapsed. You can select the switching logic to use while editing a step.
Vehicle type specific traffic lights
At junctions with incoming lanes that are designated for a certain kind of vehicle (e.g. bus or tram lanes) TM:PE automatically sets up separate traffic lights for them. This works both with vanilla roads (having separate bus/tram lanes) but also follows vehicle restrictions that you have defined for the incoming road segment: As soon as there exists a lane that is restricted to
cargo trucks,
service vehicles,
bus and/or taxis,
trams or
monorails
only, TM:PE automatically creates individual traffic lights for them.
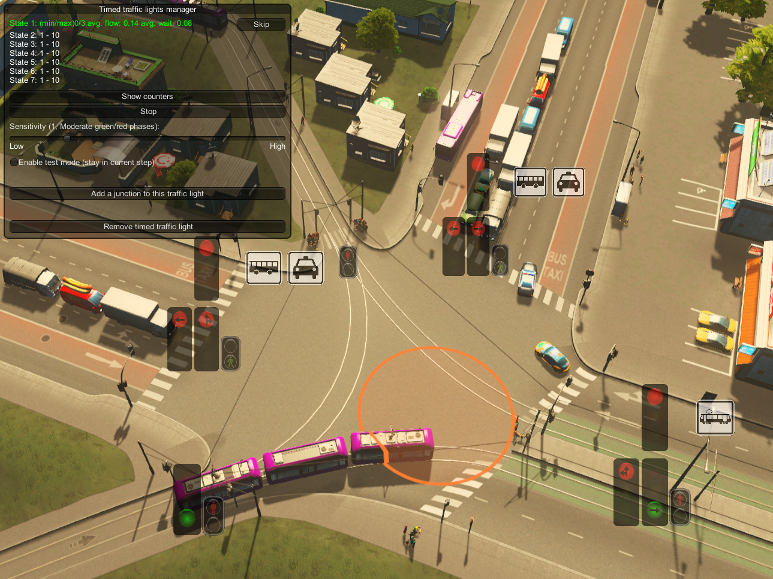
This video demonstrates setting up vehicle-separated traffic lights: https://www.youtube.com/watch?v=Jcf5wkAQ76A
Copy & paste
You can copy an existing timed traffic light from one junction to another by following these steps:
While the Timed traffic lights tool is enabled click on the junction that accommodates the timed traffic light you want to copy.
Click on the Copy button inside the timed traffic lights manager window.
With your primary mouse button click on another junction that does not already have a timed traffic light assigned.
To cancel the copy operation click anywhere with your secondary mouse button.
Rotate
In certain situations it is required that a timed traffic light must be rotated in clockwise or counter-clockwise direction. Especially when using the Copy & paste feature TM:PE is not always able to guess the correct orientation of the pasted traffic light. To rotate a timed traffic light follow these steps:
While the Timed traffic lights tool is enabled click on the junction that accommodates the timed traffic light you want to rotate.
Click on the Rotate right button in order to rotate the traffic light in clockwise direction or click on Rotate left in order to rotate it counter-clockwise.